The Complete Guide to Run a Remote Retrospective


A retrospective is an excellent opportunity to learn and improve at the end of a sprint or an iteration. It's a moment you take with your team to reflect on what you could improve based on past events.
If a team can run effective remote Sprint retrospectives, it will make it grow and improve its effectiveness when it comes to achieving tasks and creating value.
An excellent remote retrospective should always be the team's responsibility. Of course, Scrum Masters or facilitators are here to help the team find successful ways to improve continuously.
How do you make sure everyone in your team is engaged in your remote retrospective and feels psychologically safe to say what they think?
The truth is, there is no secret formula. But this guide will help you discover and pick small things to lead your team on the path of great retrospectives.
Step 1: Define the focus of your remote retrospective.
An Agile retrospective helps your teams reflect on their way of working and continuously become better in what they do.
Seize this opportunity to talk about what truly matters to your team and engage in deep conversations to create relevant action items.
Undocumented and casual talks are not enough to build a solid action plan. Do you precisely know what you want to accomplish with this retrospective?
You can use several activities to figure out your team's challenges:
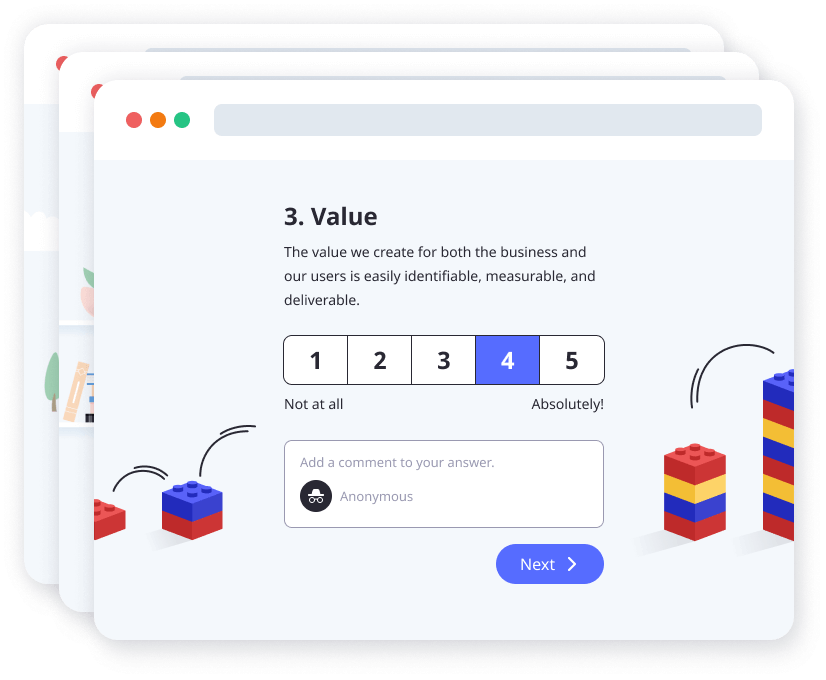
Use anonymous surveys to identify the main topics. Set one of them as a goal of the next retrospective.
Use Team Radar activity to measure the importance of different topics for your team. Take the topics with the lower scores and set one of them as a goal of the next retrospective.
Use metrics from different applications your company is using (JIRA, NPS score).
Working as close as possible to your team is a great way to find what it needs to work on.
Before running a retrospective to make your team talk about what you noticed, ask them if they think it's relevant.
The goal of a retrospective should always come from the team and not from an individual.
Step 2: Select the best remote retrospective format.
Now that you have identified your retrospective's goal, let's figure out which format is better.
The main difficulty is gathering and prioritizing multiple values to find the most suitable retrospective format. Some key questions to help you:
What is your team’s context? e.g., a positive or negative mindset. If your team is more pessimistic than optimistic, consider choosing a positive activity.
How long has your team been working together? e.g., this team is a brand new one OR this team has been working together for months. If your team is a really new one, it is good to choose an activity to help each member define their role and responsibilities.
What is the topic that you want to improve? e.g., collaboration, ownership, alignment, velocity, process, resources, fun. Even fun is an important topic to discuss. People who enjoy their jobs are more likely to be optimistic, motivated, learn faster, make fewer mistakes, and better business decisions.
Is your team more artistic or more pragmatic? e.g., some team members will be more engaged in creative retrospectives, and some will just want to use a practical format like tables.
You will have to experiment - and sometimes fail - to refine your retrospective meetings and learn more about your team. Try to bring new kinds of activities to make this ceremony the best moment of their work (drawing, metaphorical formats, creating your own format, etc.).
See your team members as customers, and do your best to provide them with the greatest experience.
Be honest, always let your team members know what they did right but also identify what they need to improve.
Esther Derby and Diana Larsen recommend the structure below in their book.
Set the stage
Gather data
Generate insights
Decide what to do
Close
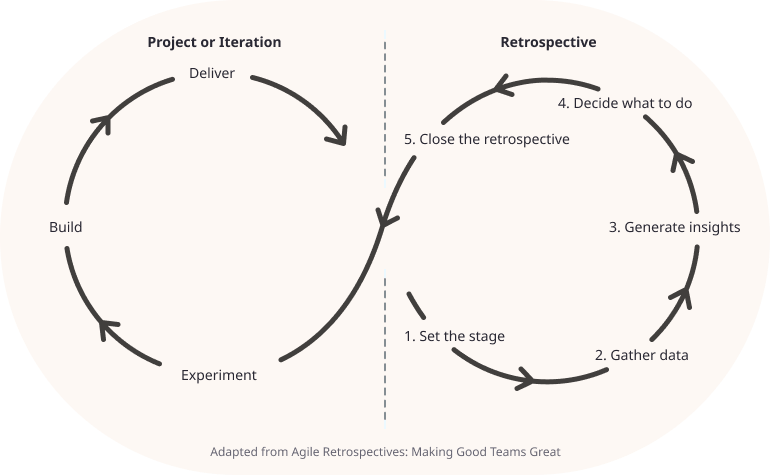
This structure aims to ensure the session flows well by providing a clear definition of done for each step.
Time management is another critical element of a successful remote retrospective.
It's an excellent practice to time-box each step. It keeps teams focused on accomplishing the task and encourages them to start getting work done immediately.
Step 3: Pick up the right tools for your online retrospective.
It is vital that you don't let tools dictate your remote retrospectives but only use them to support you.
The most valuable tool is the one that will help connect your team. It can be Slack, Zoom, or Microsoft Teams, here are the essential features you need :

Video + Sound: Everyone should have their camera on, and you should always keep an eye on your team and try to "read the room".
A backchannel: Usually included in every tool, useful to post comments or questions while someone is talking.
Visual cues: Make the process of breaking in a conversation more comfortable. Microsoft Teams has the "hand" button that helps you show everyone that you have something to say.
Depending on the type of retrospective you are running, you will then have to choose a collaboration tool.
If you want to draw or craft a super precise experience for your team, you will need a flexible tool like Mural or Miro.
Using this kind of tool will require more preparation, but some of them offer retrospective templates.
If you need to run a more structured remote retrospective, you can find a lot of different online retrospective tools like Neatro.
Most of them offer a free trial version, so you can try them until you find your team’s favorite one.
Some features you’d like to find in this kind of tool:
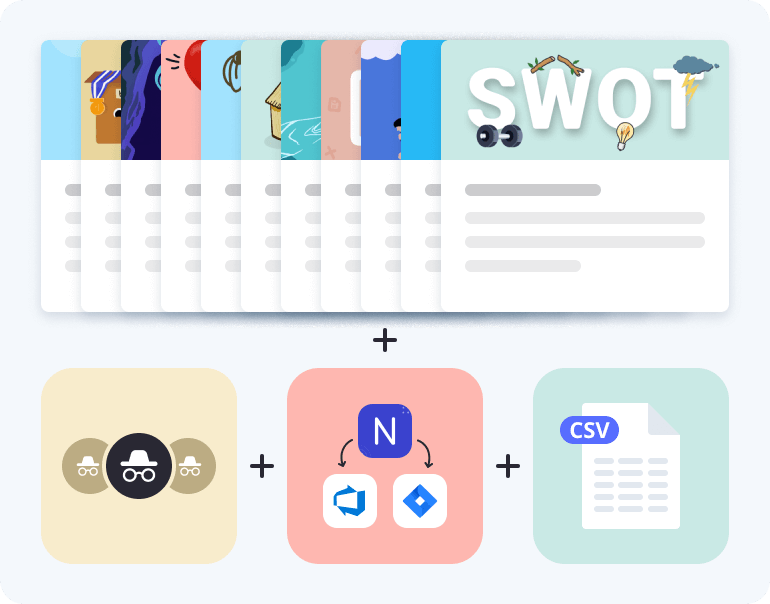
Possibility to create your own template
A good retrospective structure
History of your past retrospectives
An easy way to find your pending action items (or export them to your project management tool)
Anonymity
Step 4: Conduct your remote retrospective like a pro.
1. First, you want to set a tone that fosters connection and intimacy.
In this step, you want to help your team members feel relaxed and connected while critically thinking together.
Icebreakers are relevant exercises to achieve this state of mind. Select an activity that helps create a friendly environment and makes people more comfortable with the retrospective.
For example, you can ask a question about your team members' hobbies. The answer can be as simple as one word! It can also be an excellent opportunity to talk about the previous retrospective's action items, see if they are still pending, and ask why.
If your team is stuck with important action items, it can switch your retrospective focus to the main discussion topic.
2. Second, have the psychological safety of your team in mind. And keep it for the whole retrospective.
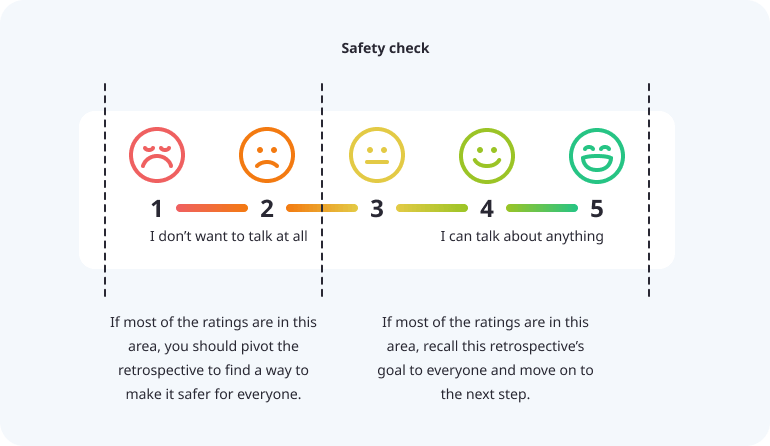
The safety check is a good exercise to determine if your team feels safe enough to be engaged in this retrospective. (you could also use activities like the traffic lights or the weather report)
Ask your team to send you a number between 1 and 5 that indicates how safe they feel for this retrospective. 5 being "I can talk about anything" and 1 being "I don't want to talk at all".
Each vote must stay anonymous, but everyone must see the result of the votes.
If this safety check is bad (more than one person with a rating of 1 or 2), it should become the focus of this retrospective.
Your team needs to find out what they need to do to make it safer for everyone to speak.
Psychological safety is the basis of a well-conducted retrospective.
If the safety check is good, recall this remote retrospective's goal to everyone and move on to the next step.
3. Now, using your favorite remote retrospective or collaboration tool, you want to give your teammates some time to write down what they think in each category of your retrospective format.
The ideas your team is writing must stay hidden until the timer is over to avoid group thinking.
If some people voted 3 or less at the safety check, you could help them feel safer during this step by:
Doing a retrospective agreement (in this retrospective, we will accept this, refuse that)
Giving the option to post ideas anonymously
Making the whole step anonymous
You can also speak to your team during this step.
Give more context around the different columns of your retrospective.
Help your team by asking them questions about specific topics you want this retrospective to focus on.
And if you feel that someone doesn't know what to write or seems a bit lost, ask them directly some questions to help them reflect.
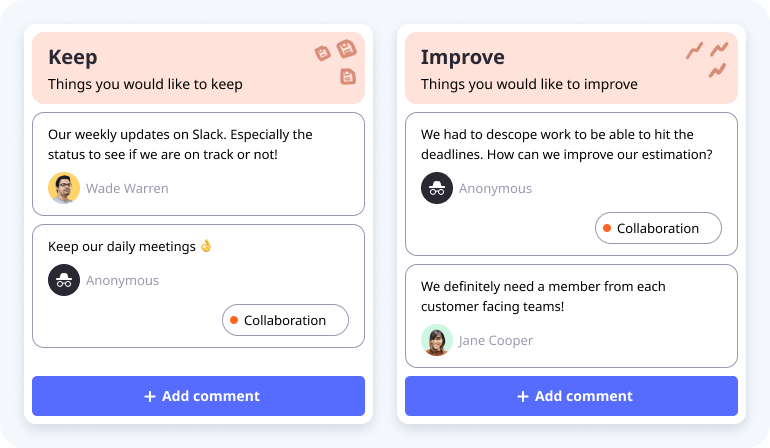
4. You helped your team generate a lot of data; it is now time to organize it.
In this step, you want each team member to go through his/her comments and give more context around them.
If someone is done speaking about an idea that another person already talked about, regroup these ideas just like you would stick two sticky notes together.
Try to identify themes or topics shared by multiple ideas. And if they don't fit with your retrospective goal, try to understand why, ask questions to your team, help them reflect.
Now that everyone has talked about their comments and the data is organized, it's time to decide what matters the most.
Dot-voting is a quick and easy way to come up with the most important topics of your retrospective.
Give each member a number of votes based on the number of ideas in the retrospective and give them 1 or 2 minutes to spend them.
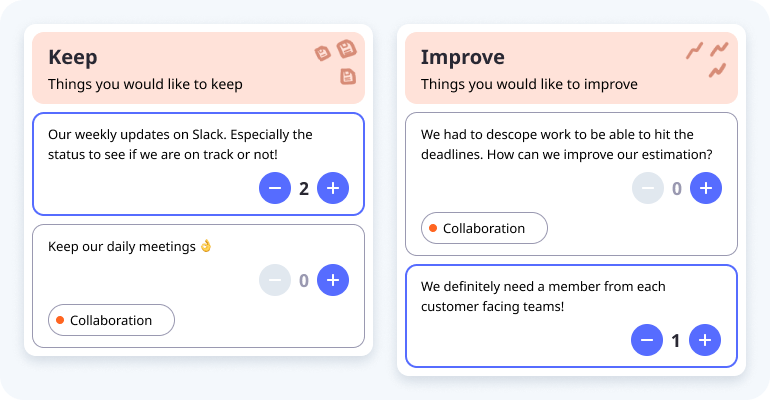
5. Your team knows the most important topics of this retrospective; you now have to help them take action.
This step is a perfect opportunity to brainstorm together around problems and find solutions.
You can use multiple brainstorming activities to achieve insights and improvements:
If you run a retrospective with a big team or have some of your team members not feeling comfortable brainstorming in a large group, tools like Zoom have a "breakout room" feature that allows you to generate insights in smaller groups and share them with all the team.
You may have a lot of possible action items at the end of this brainstorming session. You have to prioritize them.
You can use the impact/control matrix to figure out the top 3 action items you have to take care of before the next sprint.
It's more efficient to make sure the top 3 action items get done than trying to fit a list of action items in your next sprint.
Focus on small actions. You don't want to overwhelm your team.
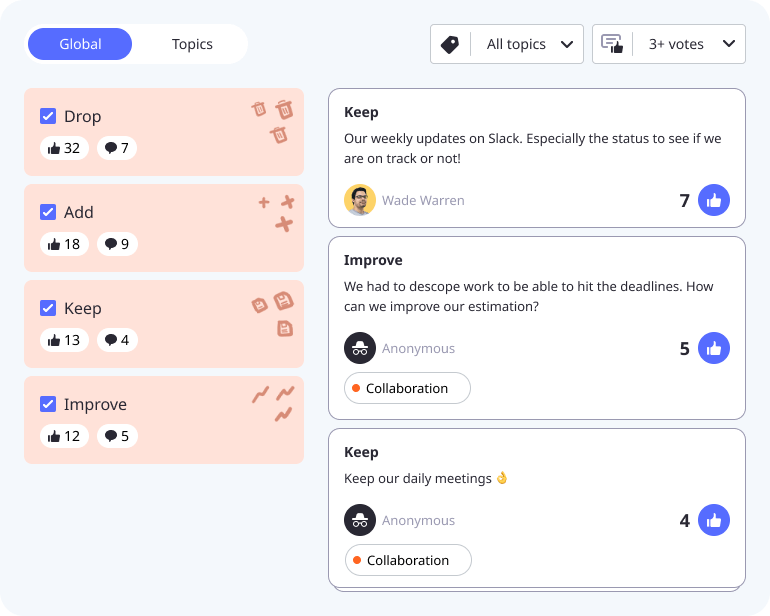
6. Retrospectives are a vital component of continuous improvement, but you also want to improve them continuously.
Gather feedback about your retrospective. A ROTI is an excellent tool for that.
Ask your team to post a number from 1 to 5 in the chat of your communication tool. This number represents the value this retrospective gives them based on the time it took.
1 means that it was a waste of time, and 5 means there wasn't a better way to spend this time.
You can also ask them to add a comment related to the note. (especially if it's 3 or less)
Your retrospective is now done, congrats! It's time to set the next steps:
Export the action items to your project management tool
Share a retrospective report with your team
Fill out a retrospective output canvas
You don't have to wait for two weeks to do another retrospective or talk about the action items, be Agile.

And remember... Review your team's commitments at the next online retrospective.
The check-in part of a retrospective is the best moment to talk about past action items and their status.
First, the action items that are still pending. Usually, a team member is accountable for each action item.
If this action item is still pending, ask people what they could do as a team to help resolve this action item.
Even if someone is accountable for this action item, it is still the team's responsibility.
Then, for the action items that have been done, ask your team if they made a difference.
These two questions are also a clever way to discover new issues and find the focus of your next retrospective.
🎁 There's your gift: our 8 top tips to make your next online retrospective a success.
Would you like to share the main takeaways of this article with your colleagues? All in a concise and pleasing format? We thought of you! Here are our top 8 tips to make your next online Agile retrospective a resounding success!
1. Structure, structure... and structure again!
A remote retrospective can save you time in preparing and setting up your activities. However, for it to succeed, the retro must imperatively follow some basic "logistical" rules. Here are some pieces of advice to make sure the retrospective structure is fun for everyone:
Turn on your camera
Turn off your microphone when not speaking
Avoid long monologues
Take a break every 45 minutes
Insert physical or breathing exercises
2. Use a collaborative retrospective tool
The tool should encourage all team members to participate. This is not the sole responsibility of the coach or the Scrum Master.
3. Keep your retrospectives both short and frequent
Remote work can be a source of many challenges. We encourage you to take more opportunities to look back on what the team has accomplished.
4. Make sure everyone is heard
Providing a space where everyone feels safe to discuss and share their opinions is crucial. Even more in a remote working environment.
5. Vary your retrospective exercises
Since you can't provide a different physical setting for every retrospective, be sure to offer diverse and refreshing activities to keep the team engaged.
6. Don't let the tool dictate the activity
Sometimes, we might want to organize our discussions around a ready-to-use retrospective model. Keep in mind that the retro template is supposed to help you conduct the necessary conversations.
7. Do your best to keep your retro "fun"
Break the ice by introducing short activities such as sharing lively anecdotes with the team. Be creative!
8. Empower your team members
In a distributed retrospective, ask team members to divide the action items among themselves.


